U盘装Win8系统的详细流程
如今,随着win8系统逐渐走向成熟,越来越多的用户走进了win8系统的这个操作平台,很多用户想使用win8系统,又困于不知道如何来安装win8系统,下面让高手教你一个简便的方法,用U盘来安装win8系统。
一、准备工作
1、 首先你的电脑必须得有一个大于20G空间的盘,如果你的盘都满了,或者没有新的盘而又怕装系统会把盘里的东西都格掉,没关系用微软自带的工具分一个新盘出来
具体步骤如下: 首先点击开始鼠标放到“计算机”
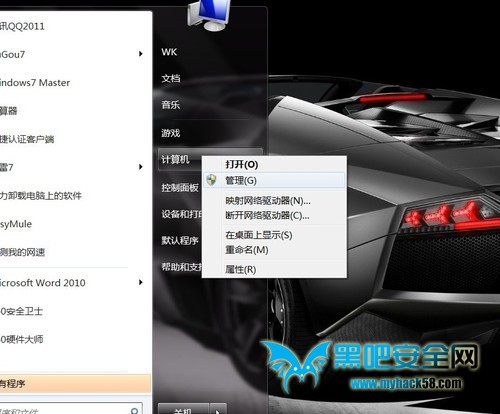
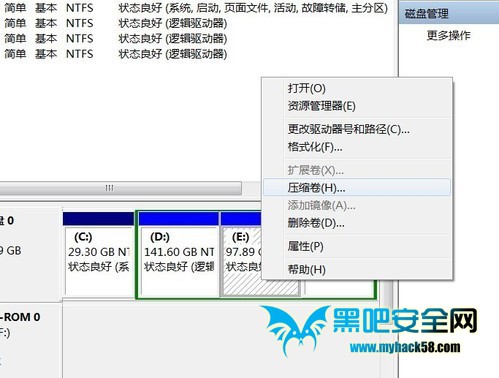
打开管理你会看到,点击磁盘管理如图
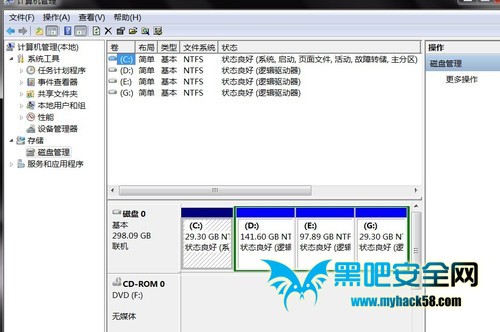
下来选择你要压缩的磁盘,最好是你最后的一个,右击选择压缩卷如图,然后就看提示了,选择你要压缩的大小也就是分盘的大小(最好把你要压缩的盘清理出30G空间)。
2、 准备一个大于4G的U盘和一个镜像文件读写软件(UltraISO),最重要的必须得有Win8的预览版iso文件。
二、制作启动盘
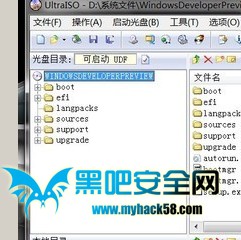
首先插入大于4G的U盘(最好提前格式化),打开UltraISO软件,如图
点击文件——打开 选择你下载好的Win8的iso文件,点击启动光盘,如图
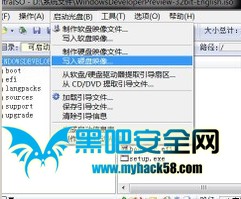
选择“写入硬盘映像”, 如图
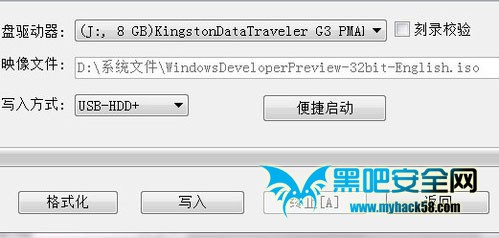
下来就要选择磁盘,一定要选择你刚才插入的U盘,写入方式用默认的HDD+或者HDD都行。因为U盘刚才格式好了,现在点击写入,它就开始写了,切忌在写入时记得千万别动你的U盘。
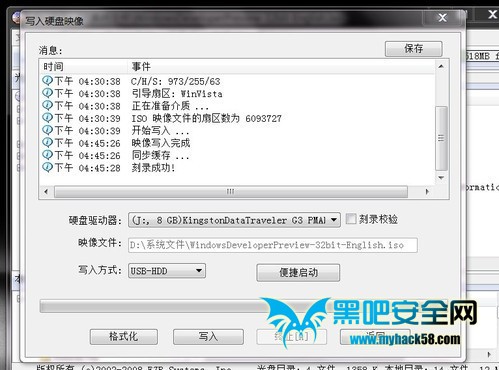
启动盘就做好后轻轻的拔出你的U盘,等待下步工作。
三、修改启动盘
启动盘做好了就该改写电脑启动顺序了,在干这事之前一定要保证你的本本不断电,或者电池最少还有25%的电量。
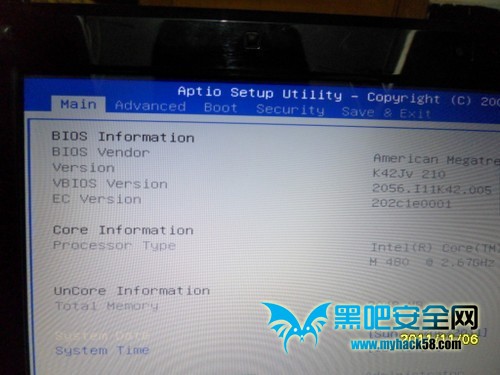
重启电脑当屏幕显示你的电脑的品牌标志时,及时的按F2键(我的是华硕的本本,按F2进入biOS,由于不同品牌进bios可能不一样,最好上网查查)进入bios后呢?如图:
选择BOOT(引导)选择之后如图:
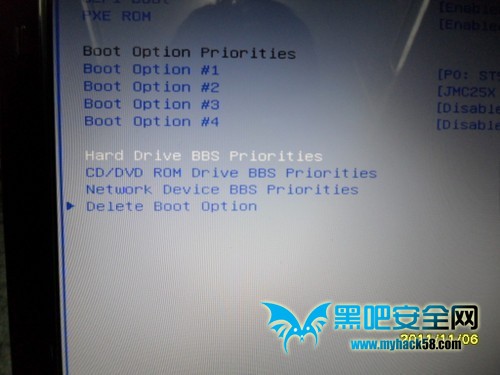
选择hard drive bbs priorities(硬盘启动顺序)进去之后会看到:
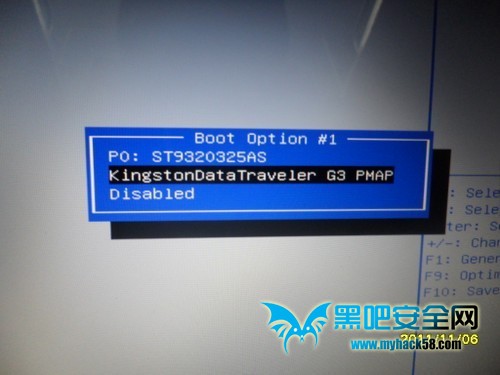
不同品牌的U盘会看到不同的东西,只要是选择这个,记得是菜鸟的千万别动其他的:
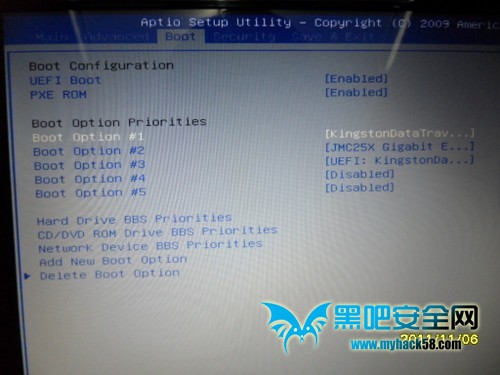
到这步时,在选择上面的save & exit 然后保存并退出。
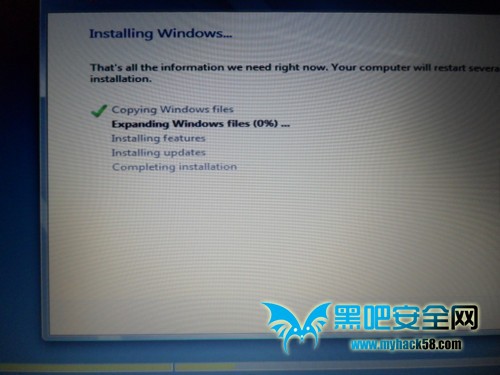
四、装Win8
快速插上U盘,当插上U盘(记得是你做的启动盘的U盘,别插错了)后会出现如图所示:
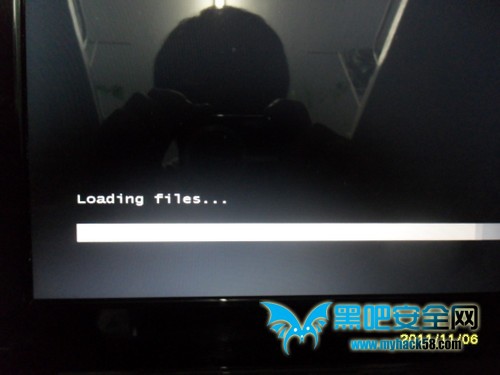
正在载入文件:
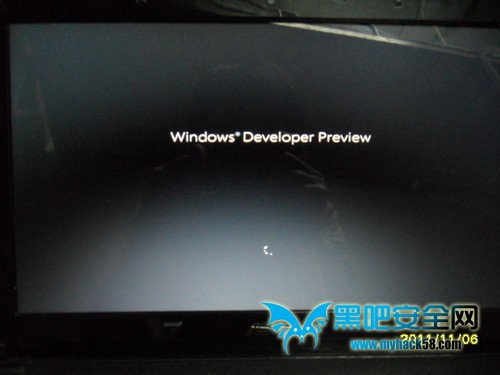
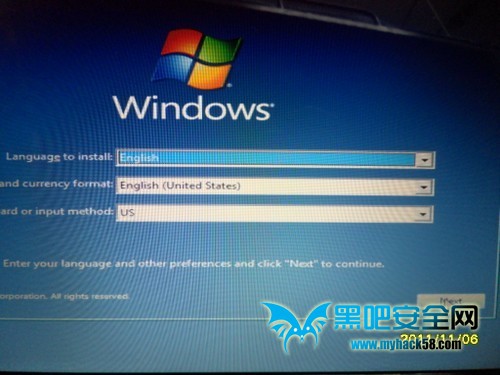
这就和装win7一样了,因为是预览版的所以只有英文版,直接点击Next:
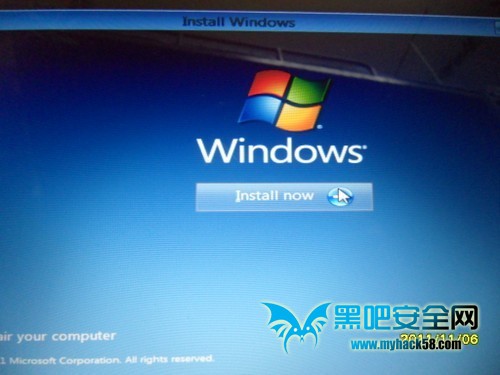
点击Install now(立即安装)
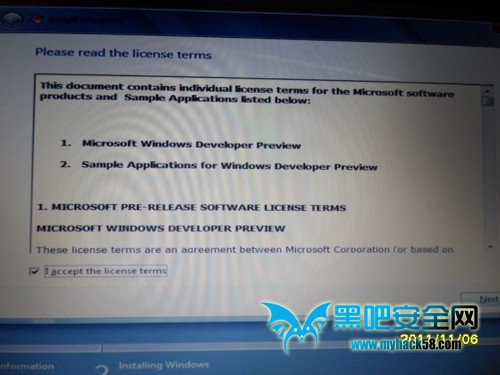
这项打勾,然后接着Next
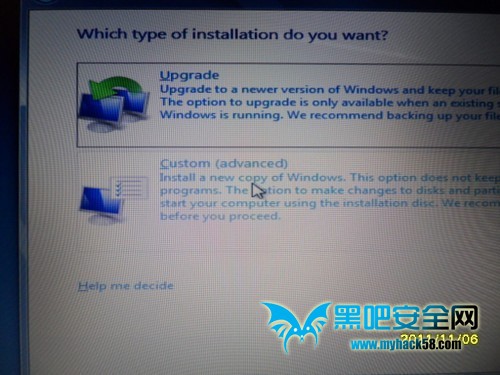
到这步就要注意了,要选择鼠标指的这项,因为要自定义安装,要安装到你刚开始新分的盘,然后
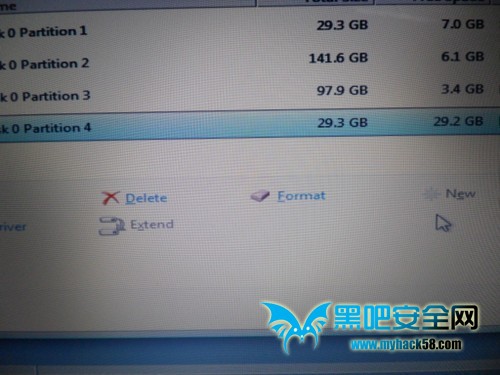
选择你新分的盘,点击Format(格式化),点击Next 出现如图: