Windows 8系统有线网卡自动获取IP地址
2016-08-18 18:14:04
来源:
三联教程
设置动画示范教程:
Windows 8系统有线网卡自动获取IP地址设置动画
Windows 8系统有线网卡自动获取IP地址的详细设置步骤如下:
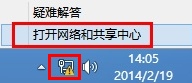
第一步:进入Windows 8系统的经典桌面,在电脑桌面右下角找到网络图标![]() ,右键点击并选择 打开网络和共享中心。如下图所示:
,右键点击并选择 打开网络和共享中心。如下图所示:
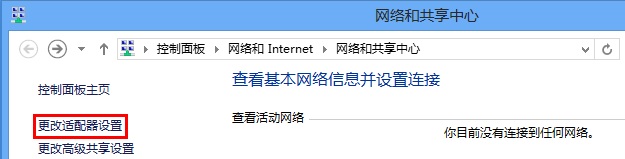
第二步:弹出 网络和共享中心 的界面,点击 更改适配器设置。如下图所示:
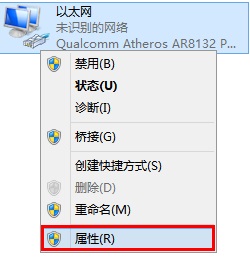
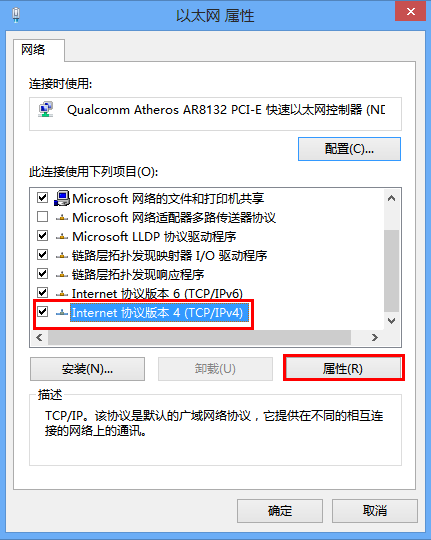
第三步:打开 更改适配器设置后,找到 以太网,右键点击并选择 属性。如下图所示:
第四步:找到并点击 Internet协议版本4(TCP/IPv4),点击 属性。如下图所示:
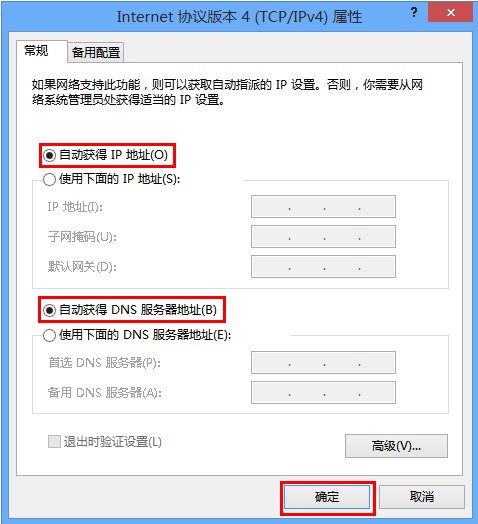
第五步:选择 自动获得IP地址(O)、自动获得DNS服务器地址(B),点击 确定。如下图所示:
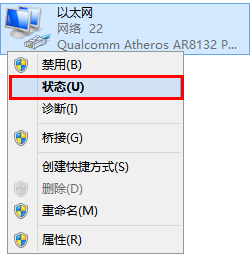
找到 以太网,右键点击并选择 状态。如下图所示:
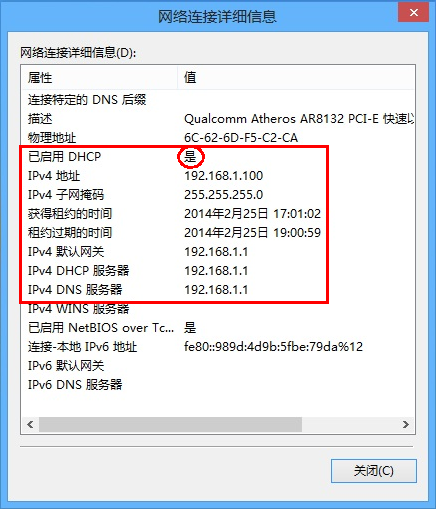
点击 详细信息,如下图所示:

在详细信息的列表中确认“已开启DHCP”为是,而且可看到自动获取到的IPv4地址、默认网关、DNS服务器地址等信息,表明电脑自动获取IP地址成功。
至此,有线网卡自动获取IP地址设置步骤完成。
注:更多精彩教程请关注三联电脑教程栏目,三联电脑办公群:189034526欢迎你的加入